Creating a custom font can give your design a unique identity and make it stand out from the rest. Whether you’re a graphic designer, a brand owner, or just a typography enthusiast, developing your own font opens up new possibilities for creative expression. The best part? You don’t have to spend money on expensive software to create one. In this article, we will explore how to create your own font for free, providing step-by-step guidance, tools, and tips to get you started.
Why Create Your Own Font?

Before diving into the process of creating a font, it’s essential to understand why you might want to do so. Custom fonts offer numerous advantages, including:
- Unique Branding: A personalized font can significantly enhance your brand identity, helping it stand out in a crowded marketplace.
- Creative Expression: Fonts are a form of visual language, and creating your own gives you the freedom to express your ideas exactly how you envision them.
- Consistency Across Media: Having a unique font ensures consistency in your messaging, whether it’s on digital platforms, print, or packaging.
- Ownership: You fully own a custom font, which can be a valuable asset for future projects or branding campaigns.
Understanding Font Creation Basics

Before embarking on the font creation journey, it’s crucial to understand a few basic concepts:
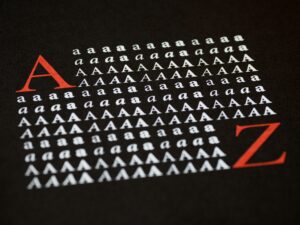
- Font Anatomy: Fonts are made up of individual characters, each with unique characteristics, such as serifs, stems, bowls, and ascenders.
- Typeface vs. Font: A typeface refers to the design of the letters, while a font is the specific style or weight (e.g., regular, bold, italic) of that design.
- Kerning, Leading, and Tracking: These terms refer to the space between characters (kerning), lines (leading), and the overall spacing of text (tracking). Understanding these concepts helps improve the legibility and aesthetics of your font.
Tools to Create Your Own Font for Free

Thanks to advances in technology, there are several free tools available that make font creation accessible even to beginners. Here are some of the most popular ones:
- FontForge: A free, open-source font editor that supports various font formats. It allows you to design and edit your font from scratch or modify existing templates.
- Glyphr Studio: A web-based font creation tool that’s easy to use and perfect for beginners. It lets you design vector-based characters and export them as font files.
- Calligraphr: This tool allows you to turn your handwriting into a font. After filling out a template, you can scan and upload it to the platform to create a font based on your handwriting style.
- BirdFont: Another open-source font creation software with a simple interface and powerful tools for creating vector-based fonts.
Step-by-Step Guide to Creating Your Own Font

Once you’ve chosen your tool, here’s a general step-by-step guide to help you get started with font creation:
Step 1: Sketch Your Ideas
Before jumping into the digital process, it’s a good idea to sketch your font ideas on paper. Think about the style you’re going for—whether it’s modern, vintage, minimalist, or decorative. You can even experiment with variations for different characters and letters.
Step 2: Set Up Your Font Design Tool
Choose one of the free tools mentioned earlier and start a new project. Familiarize yourself with the layout and the options available, such as the ability to create individual characters or set up grid lines for precision.
Step 3: Create Each Character
Now it’s time to create your characters. Start with the basic alphabet (uppercase and lowercase), numbers, and punctuation marks. Make sure to keep the design consistent, using the same stroke width and alignment throughout.
Step 4: Adjust Spacing and Kerning
Once you’ve created your characters, focus on the spacing between them. Proper kerning ensures that the letters are spaced evenly and read smoothly when used in a sentence or word.
Step 5: Export and Install Your Font
After finalizing the design, you can export your font into a usable format (e.g., .otf or .ttf). Then, install it on your computer for use in any design software.
Best Practices for Designing Your Font
Creating a functional and visually appealing font takes more than just drawing characters. Here are some best practices to keep in mind:
- Maintain Consistency: Ensure that all characters follow the same style guidelines, such as stroke width, curve shape, and alignment.
- Consider Readability: Make sure your font is easy to read, especially for longer texts. Avoid overly intricate designs for body text fonts.
- Test Your Font: Use your font in different design projects to see how it performs in various contexts. Adjust spacing and design as needed.
- Use Contrast: Introduce contrast between thick and thin strokes for a more dynamic and visually interesting font.
Case Studies: Successful Free Font Creations

To understand how powerful custom fonts can be, let’s look at some case studies where free font creation played a crucial role:
- Google’s Roboto: While not created for free, the open-source Roboto font became a game-changer for web and mobile design. It shows how free fonts can make a lasting impact.
- Calligraphr Fonts for Personal Projects: Many designers have used Calligraphr to transform their handwritten text into fonts for personal projects or small businesses, adding a personal touch to their designs.
How to Use Your Custom Font Effectively

Once you’ve created your font, it’s important to know how to use it effectively across different platforms. Here are some tips:
- Consistency is Key: Use your custom font consistently across your branding materials, website, and social media to create a cohesive look.
- Pair It with Other Fonts: While your custom font is unique, pairing it with other complementary fonts can improve your design and make it more versatile.
- Keep it Web-Friendly: Make sure your font is optimized for web use, ensuring it’s legible on different screen sizes and resolutions.
Conclusion
Creating your own font for free is a rewarding and creative process that can significantly enhance your design projects. With the right tools and understanding of basic font design principles, you can create a custom font that perfectly suits your style and needs. Whether for personal projects or professional branding, having a unique font allows you to express your creativity while ensuring consistency across all your designs.
By following the steps outlined in this article and considering the best practices shared, you’ll be on your way to creating a stunning font that reflects your individuality and creativity. Remember, the key to a successful font lies in consistency, legibility, and how it communicates with your audience.